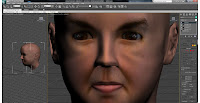
I have learnt a lot doing this project and I feel like my 3d max skills have greatly improved.
I have learnt how to create complex shapes, like the face and the ear, in a simple way and I have also learnt a lot about how to use the uvw map tool and how to use materials to make the shape look more realistic.
I am pleased with my head. I feel the profile and the eyes and nose look like me although the mouth doesn't as much.
Friday, 22 October 2010
Hair
I found the hair and fur tool very difficult to use. I had difficultly stopping the hair going through the head even though I told it to collide with polygons. Also even though I had styled the hair so it was all straight and tidy some stray hairs still stuck up at strange angles.
To solve this problem I tried making hair using polygons. I created a copy of the top of the head and using the cylinder tool I created a ponytail and a fringe. I used my reference photo to create a material for the hair and I made slight changes to the uvwmap just to get the material looking right.
To solve this problem I tried making hair using polygons. I created a copy of the top of the head and using the cylinder tool I created a ponytail and a fringe. I used my reference photo to create a material for the hair and I made slight changes to the uvwmap just to get the material looking right.
Wednesday, 20 October 2010
Another Picture!!
Light Map
Picture!!
To Fix This...
I clicked on bitmap and added a mix to the bump channel. On the empty channel on the mix parameters I added some noise. I chose the noise type fractal and then messed around with the bump and the mix amount until I got the effect I wanted.
Bump Map
Sorted Out the Face
Tuesday, 19 October 2010
And This is What It Looks Like
Adding A Face
Wednesday, 13 October 2010
UVW Mapping
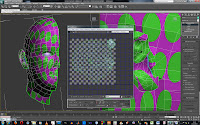
Mapping the head now, I selected the head appart from the ear. I then selected uvw unwrap and then selected edit. I then whelded points together using target wheld, Then I relaxed it, checked that there weren't any inverted or overlapping polygons (there weren't) and relaxed certain parts of it and centre relaxed the eye.
I then selected just the ear and used pelt to flatten out the shape. I fiddled with it to get it to work like pelting it and the relaxing it until I couldn't flatten it any further.
Creating the Ear
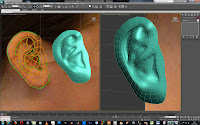
I used the same method creating the ear as I did when creating the face. I first drew out the polygons, used the line tool to trace them and then I turned this shape into an editable poly. I then used the front view reference picture to give the ear shape. I then, using the chamfer tool, moved the inner parts of the ear back and the outer lope forward by selecting the right polygons.
I am very happy with the end result, I think it looks a lot like my ear.
Tuesday, 12 October 2010
Adding Detail to the Face
The Head
Problem With Modelling the Head
The problem with the tutorial videos I have been working from is that, when showing how to create the overall shape of the head, he goes from this...
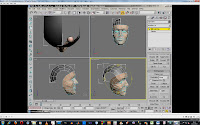

... to this...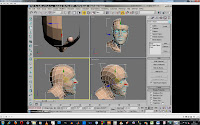
I'm not sure how he did this, the sphere he used to create the top of the head seems to have gone too. 
Wednesday, 6 October 2010
The Nose
Subscribe to:
Comments (Atom)


